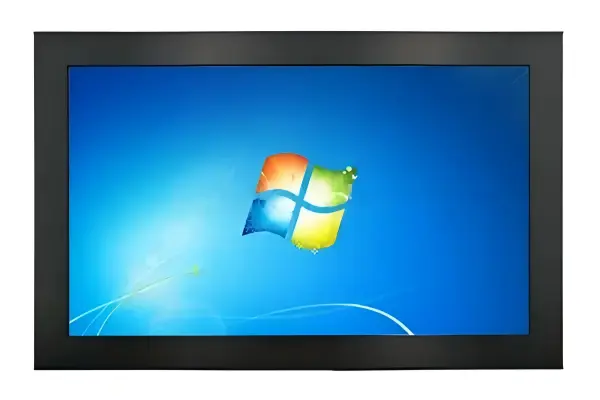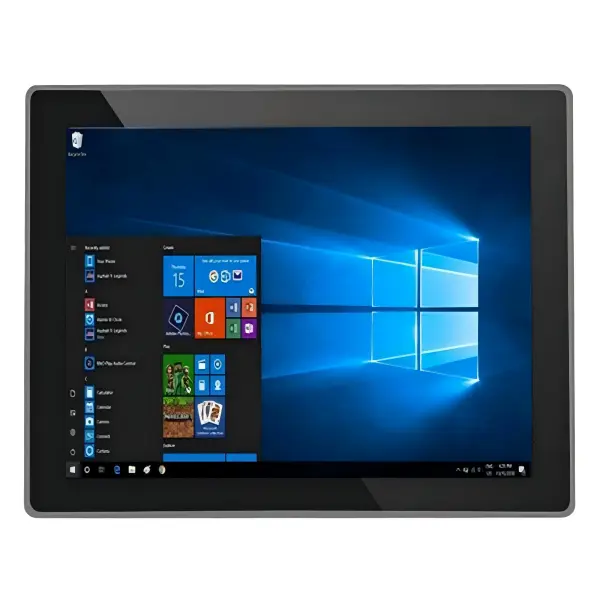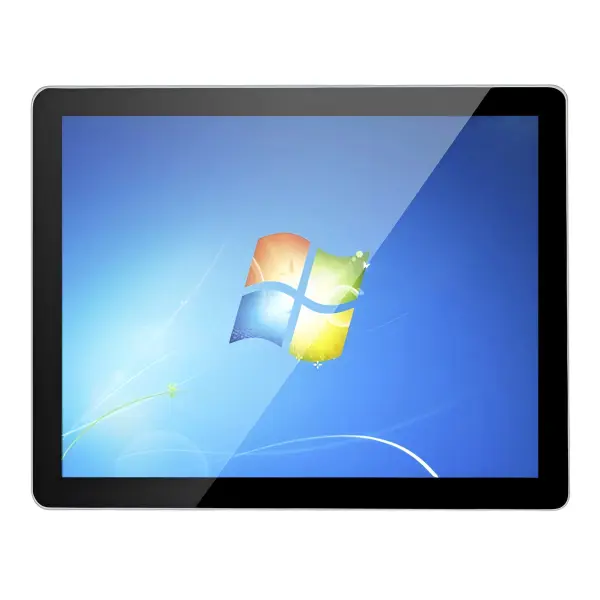
A touch screen monitor for kiosk applications can look suitable on a specification sheet yet create costly integration problems after the enclosure is built. A poor mechanical fit, mismatched touch technology, or inadequate brightness can delay a project. I recommend starting with the kiosk structure and real operating conditions before comparing prices.
A touch screen monitor for kiosk applications should be selected as part of the complete kiosk system, not as an isolated component. Engineering and procurement teams should first confirm the enclosure dimensions, visible viewing area, mounting method, orientation, service access, and internal space. They should then match touch technology, brightness, environmental protection, interfaces, and 24/7 operating expectations to the real deployment environment.
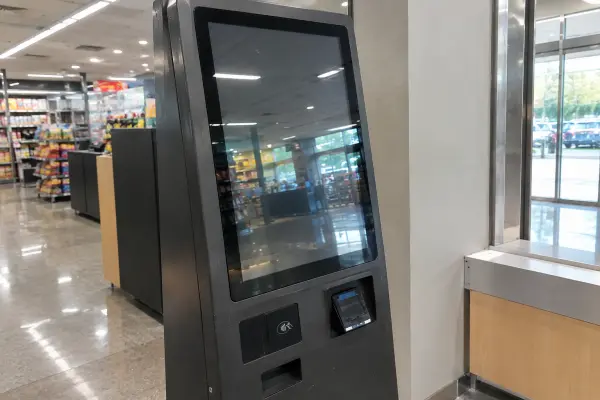
In my work supporting requirement reviews, samples, and production discussions, I have seen the same pattern repeatedly: teams often begin with a screen size, then discover later that the bezel, touch overlay, cable routing, or heat management does not fit. A more connected selection process reduces those risks before a quotation or prototype is issued.
Why Should Mechanical Fit Come Before Choosing a Touch Screen Monitor for Kiosk Applications?
A nominal 15-inch, 19-inch, or 21.5-inch display may seem like a simple starting point. However, kiosk projects often fail early because the physical display assembly does not fit the cutout, mounting frame, or visible window. A screen that is “close enough” in size may still require expensive enclosure redesign.
Mechanical fit should be the first decision gate for a touch screen monitor for kiosk applications. Buyers should verify the active viewing area, outer dimensions, bezel profile, mounting-hole pattern, panel depth, rear clearance, and service access before selecting a display size or touch technology. The enclosure should define the monitor, not the other way around.
Start With the Visible Area, Not the Nominal Diagonal
The display’s diagonal size is useful, but it does not tell the full integration story. Two monitors with the same nominal size can have different:
- Active display areas
- Outer dimensions
- Front bezel widths
- Touch glass borders
- Mounting locations
- Rear housing depths
- Cable exit directions
For example, a kiosk front panel may have a fixed glass window or metal cutout. In that situation, the engineering team should define the required visible area first. The visible area must align with the LCD active area and the touch-active region without leaving unwanted black borders or exposing the display edge.
I usually ask for a mechanical drawing or at least these dimensions before discussing a final model:
| Mechanical Item | Why It Matters for Kiosk Integration |
|---|---|
| Front cutout size | Determines whether the display can sit behind or within the kiosk panel |
| Visible window size | Must match the LCD active area and touch area |
| Maximum rear depth | Prevents interference with printers, payment devices, PCBs, and cable assemblies |
| Mounting-hole positions | Determines whether standard brackets or custom mounts are needed |
| Bezel constraints | Affects the appearance and sealing of the kiosk front |
| Service clearance | Supports replacement, cleaning, and maintenance access |
| Screen orientation | Influences cable routing, heat flow, and interface placement |
Consider Installation Method Early
A kiosk touch display can use several installation approaches. Each method affects the enclosure design and the monitor construction.
Common approaches include:
Open-frame mounting
An open-frame monitor is often installed behind a kiosk front panel. This approach gives OEMs flexibility over the outer enclosure appearance.Panel-mount installation
A panel-mount display may use a front flange, gasket, or mounting clips. It can simplify installation when the enclosure supports the required cutout dimensions.VESA mounting
VESA mounting can work for internal kiosk structures, especially when the monitor is installed on a bracket or adjustable frame.Custom brackets or rails
Larger kiosks or specialized machines may require dedicated support structures to manage display weight, vibration, and service access.
I have found that a screen selection becomes much easier when a customer shares the enclosure drawing at the beginning. Even a preliminary 2D drawing can identify conflicts before a sample is built. This is particularly important for compact payment kiosks, vending machines, ATM upgrades, and wall-mounted self-service terminals.
Which Touch Technology Fits a Touch Screen Monitor for Kiosk Applications?
Many teams ask which touch technology is “best.” In practice, no touch method is best for every touch screen monitor for kiosk applications. The practical choice depends on how users interact with the kiosk, what they may be wearing, and what contaminants or environmental conditions the screen may encounter.
The right touch technology for a touch screen monitor for kiosk applications depends on the expected user behavior and environment. Project teams should assess bare-finger use, glove use, wet hands, cleaning chemicals, public traffic levels, required touch accuracy, and front-panel protection. PCAP is often suitable for modern multi-touch interfaces, while resistive, infrared, or SAW touch can be appropriate in specific operating conditions.[1]
Compare the Interaction Conditions
A kiosk monitor must support the intended interaction, not only look responsive in an office demonstration. A public ticket machine, factory HMI terminal, outdoor payment kiosk, and restaurant self-ordering kiosk can have very different requirements.
| Touch Technology | Typical Strengths | Points to Validate |
|---|---|---|
| PCAP capacitive touch | Multi-touch support, smooth glass surface, modern user experience | Glove compatibility, water behavior, touch tuning, cover-glass thickness |
| Resistive touch | Can respond to finger, stylus, and many glove types | Surface durability, optical clarity, single-touch limitations in many designs |
| Infrared touch | Can support gloved operation and large display sizes | Bezel depth, dust accumulation, frame protection, false-touch risk |
| SAW touch[2] | Good optical clarity and responsive touch in controlled environments | Sensitivity to surface contamination, water, and kiosk exposure conditions |
PCAP Touch for Public-Facing Kiosks
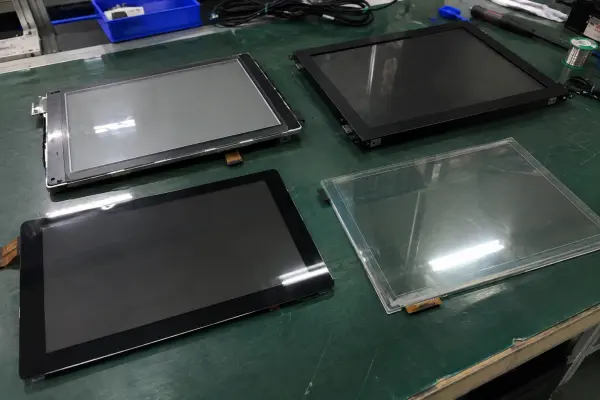
Before comparing touch methods, it helps to review how a touch screen monitor is actually constructed, because the sensor position and cover stack influence how each technology behaves inside an enclosure.
Projected capacitive, or PCAP, touch is widely used in self-service kiosks because it supports familiar smartphone-like interaction. It can support multi-touch gestures and can be combined with a flat, easy-to-clean cover glass.
However, teams should not assume every PCAP solution behaves the same way. The controller settings, cover-glass thickness, edge treatment, grounding, enclosure material, and environmental electrical noise can affect touch behavior.[3] A touchscreen that works on an open desk may need further tuning after installation in a metal kiosk enclosure.
For example, I would ask these questions during a PCAP touch review:
- Will users wear medical, winter, work, or food-service gloves?
- Could users touch the screen with wet fingers?
- Will the kiosk be installed near motors, payment hardware, or other electrical devices?
- Does the front glass need anti-glare, anti-fingerprint, or vandal-resistant treatment?
- Is multi-touch actually required by the software interface?
- Will the kiosk front panel affect grounding or touch sensitivity?
Avoid Choosing by Fashion
A modern glass-front interface may make PCAP the right choice for many deployments. Yet a factory-adjacent terminal, outdoor machine, or heavily gloved workflow may justify a different method. The correct decision comes from a sample evaluation in the intended integration context.
I encourage buyers to define how people will use the kiosk before choosing the touch system. That simple change prevents the project from optimizing appearance while overlooking usability.
How Do Brightness and Ambient Light Affect a Touch Screen Monitor for Kiosk Applications?
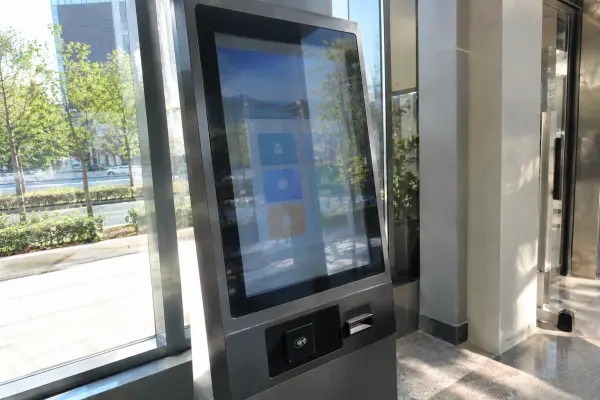
A kiosk display that looks clear in a meeting room may become difficult to read near a window, under strong retail lighting, or outdoors. Brightness is important, but it is only one part of readable kiosk design. Reflections, cover glass, screen orientation, and interface design also influence whether users can complete a transaction comfortably.
For a touch screen monitor for kiosk applications, brightness should be selected according to actual ambient light exposure rather than a generic “higher is better” rule. Indoor kiosks may need a different display strategy than window-facing, semi-outdoor, or full-outdoor installations. Buyers should assess luminance, glare, reflections, thermal load, power consumption, and display readability together.
Brightness Is Only One Readability Variable
Display brightness is generally specified in cd/m², often called nits. A standard indoor industrial display may be suitable for controlled environments, while high brightness monitors can be considered for stronger ambient light. However, increasing brightness can also increase power consumption and internal heat.[4]
A practical evaluation should include:
- The kiosk’s orientation toward windows or direct sunlight
- Overhead lighting and reflective flooring
- The angle at which users view the screen
- Cover-glass reflection
- The color and contrast of the user interface
- The kiosk’s internal ventilation path
- The expected operating schedule
Consider the Whole Optical Stack
A kiosk display is not simply an LCD panel behind a hole in metal. The final optical stack can include:
- LCD panel
- Touch sensor
- Cover glass
- Air gap or optical bonding
- Anti-glare treatment
- Anti-reflective coating
- Printed borders or blackout areas
- Kiosk front glass
Each layer can affect reflections and perceived contrast.[5] In some projects, a carefully chosen anti-glare treatment and enclosure angle may improve usability without requiring the highest available brightness level.
I have learned during early sample discussions that brightness questions should always lead to installation questions. “Where will the kiosk stand?” is often more useful than “How many nits does the display have?”
Validate Heat Alongside Brightness
High-brightness LCDs may generate additional heat.[6] A kiosk enclosure with a payment terminal, receipt printer, industrial PC, router, and power supply can already have limited thermal margin. The team should review airflow, fanless design constraints, ventilation openings, and internal component spacing.
For applications with temperature variation, buyers should request relevant operating-temperature documentation and verify that the proposed panel and electronics match the project requirement. A supplier’s stated temperature range should be treated as a document to review, not as a substitute for application-specific validation.
What Reliability Factors Matter for a Touch Screen Monitor for Kiosk Applications?
Kiosks can operate for long periods with frequent user interaction. They may experience dust, vibration, cleaning routines, temperature changes, and limited maintenance access. Therefore, an indoor sample demonstration should not be treated as proof that the display will remain suitable in the final deployment.
A reliable touch screen monitor for kiosk applications should be assessed for the real operating environment, including duty cycle, temperature range, dust exposure, cleaning practices, vibration, power conditions, and maintenance access. Buyers should review industrial component sourcing, burn-in procedures, inspection records, certification documents, and product lifecycle plans during supplier evaluation.
Separate Demonstration Performance From Deployment Suitability
A sample unit may respond correctly during a short office test. That is useful, but it does not answer every deployment question. Long-term suitability depends on the kiosk’s final environment and integration.
Teams should consider the following conditions:
| Operating Condition | Questions for Engineering and Procurement |
|---|---|
| Continuous operation | Is the monitor intended for extended daily or 24/7 operation? |
| Temperature variation | What is the realistic internal and external temperature range? |
| Dust and contaminants | Is the front panel sealed? Can dust enter through vents or touch-frame gaps? |
| Cleaning routine | Which cleaning agents, cloths, and cleaning frequency will be used? |
| Moisture exposure | Can rain, condensation, wet fingers, or washdown occur? |
| Vibration | Will the kiosk be placed in transportation, manufacturing, or high-traffic locations? |
| Power quality | Does the system need 12V, 24V, or wide-range DC input support? |
| Repair access | Can technicians remove the monitor without dismantling the full kiosk? |
Review Manufacturing Controls
For procurement teams, supplier evaluation should support validation rather than replace it. I recommend requesting documentation and asking clear process questions.
Useful items may include:
- Mechanical drawings with revision control
- LCD panel brand and grade information
- Touch controller and interface details
- Inspection process descriptions
- Burn-in or aging-test procedures
- Product certification documents, where applicable
- Packaging specifications
- Warranty, DOA, and RMA procedures
- Lifecycle supply expectations for critical components
At AplusLCD, our manufacturing process includes component sourcing, assembly, aging, quality inspection, and traceability through ERP records. Our team can support customization discussions around size, brightness, touch method, power input, and mounting. Still, I believe each buyer should validate the final configuration in the actual kiosk environment, especially where sunlight, wide temperatures, or public use create application-specific risks.
Plan for Serviceability
A monitor can be technically capable and still create a poor ownership experience if replacement takes hours. Service access should be part of the enclosure review. Engineers should confirm whether a technician can remove the display from the front, rear, or internal service panel without disconnecting unrelated kiosk modules.
Which Interfaces and System Details Should Be Confirmed Before Sampling?
Teams sometimes finalize the display only to find an interface mismatch with the kiosk PC, controller board, or cable harness. These issues are avoidable when display, touch, power, and mechanical requirements are reviewed together before a sample order.
Before sampling a touch screen monitor for kiosk applications, buyers should confirm video input, touch interface, power input, cable locations, controller compatibility, screen orientation, and software support. These connected details help prevent late-stage changes to the enclosure, wiring harness, or kiosk control system.
Confirm Video, Touch, and Power Separately
A touchscreen monitor normally has at least three connection categories:
Video signal
Common options can include HDMI, DisplayPort, VGA, DVI, LVDS, or eDP, depending on the monitor architecture and host system.Touch signal
USB is common for many touch controllers. Some legacy or specialized systems may use serial communication or other interfaces.Power input
Kiosk systems may use AC power internally, 12V DC, 24V DC, or wide-range DC input such as 9–36V. The available power architecture should be confirmed early.
The correct interface is not simply the newest option. It must match the existing system, cable length, electromagnetic environment, and planned service process.
Use a Pre-Sample Requirement Sheet
I recommend that teams create a short requirement sheet before asking for a sample or quotation. It does not need to be complex, but it should connect the critical decisions.
| Requirement Area | Information to Confirm |
|---|---|
| Kiosk structure | Cutout, visible area, rear depth, mounting, orientation |
| Display | Size, resolution, brightness target, viewing requirements |
| Touch | Technology, gloves, water, multi-touch, cover glass |
| Environment | Indoor, semi-outdoor, outdoor, dust, temperature, cleaning |
| Electronics | Video interface, touch interface, power input, cable direction |
| Compliance | Target market and required CE, FCC, RoHS, REACH, or other documents |
| Production | Sample quantity, pilot run, forecast volume, expected lifecycle |
| Service | Spare units, replacement access, warranty and RMA process |
A requirement sheet makes supplier conversations more productive. It also helps procurement compare quotations on a like-for-like basis. A low price may reflect a different LCD panel, lower brightness, alternate touch system, or missing mechanical adaptation. Without a controlled specification, price comparisons can be misleading.
Frequently Asked Questions
What size touch screen is best for a kiosk?
The best size depends on the kiosk’s visible opening, user distance, interface layout, and enclosure space. I recommend defining the active viewing area and front-panel cutout before choosing a nominal screen size. A larger display is not automatically better if it reduces service space or creates mechanical conflicts.
Is PCAP touch always the best option for kiosks?
No. PCAP touch is often suitable for modern public-facing interfaces because it supports a smooth glass surface and multi-touch interaction. However, glove use, wet conditions, contamination, enclosure grounding, and software needs can make resistive, infrared, or SAW touch methods more practical.
How much brightness does a kiosk touch monitor need?
Brightness should match the deployment environment. A controlled indoor kiosk usually has different needs from a window-facing or outdoor kiosk. Teams should evaluate ambient light, reflections, cover glass, screen angle, power consumption, and thermal management instead of choosing brightness based on one number alone.
Should I test a kiosk monitor inside the final enclosure?
Yes. A sample should ideally be evaluated in a representative enclosure with the intended cables, power system, touch settings, and software. This helps identify issues involving mechanical fit, heat, glare, grounding, cable access, and touch behavior before pilot production.
What should procurement teams request from a kiosk monitor supplier?
Procurement teams should request dimensional drawings, interface specifications, panel and touch details, quality-control information, relevant certification documents, lifecycle expectations, packaging information, and warranty terms. They should also confirm sample lead time, production lead time, revision control, and the process for customized parts.
Conclusion
Choosing a touch screen monitor for kiosk applications requires more than comparing diagonal size, resolution, and unit price. I recommend beginning with the kiosk enclosure, visible-area requirements, mounting structure, and service access. Teams can then select touch technology, brightness, environmental protection, interfaces, and reliability controls as connected system decisions. If you are planning a kiosk, vending machine, self-service terminal, or equipment upgrade, our AplusLCD team can review your drawings and requirements to help you evaluate a suitable monitor configuration before sampling.
Footnotes
-
"(PDF) Touch Screens Technologies", https://www.academia.edu/16297034/Touch_Screens_Technologies. Touchscreen reference sources distinguish capacitive, resistive, infrared, and surface-acoustic-wave systems by their sensing mechanisms; these mechanisms help explain differences in multi-touch capability, input methods, and sensitivity to environmental conditions. Evidence role: general_support; source type: encyclopedia. Supports: Definitions and commonly documented operating principles of projected-capacitive, resistive, infrared, and surface-acoustic-wave touchscreens.. Scope note: Technology descriptions do not establish that any one method is optimal for a particular kiosk without application-specific testing. ↩
-
"Explained: How Touchscreens Work", https://www.designreview.byu.edu/collections/explained-how-touchscreens-work. Descriptions of surface-acoustic-wave touchscreens explain that touch is detected through changes in acoustic waves travelling across the screen, so contaminants or liquid on the surface can interfere with detection. Evidence role: mechanism; source type: education. Supports: Surface-acoustic-wave touchscreen operation relies on acoustic waves across the display surface and can be disrupted by material that interferes with those waves.. Scope note: Actual susceptibility varies with the specific SAW design, bezel sealing, and exposure level. ↩
-
"Explained: How Touchscreens Work", https://www.designreview.byu.edu/collections/explained-how-touchscreens-work. Technical research on capacitive touch sensing shows that changes in cover construction, grounding, controller configuration, and electromagnetic interference can alter signal quality and touch-detection performance. Evidence role: mechanism; source type: research. Supports: Capacitive-touch signal detection depends on electrode geometry, cover material and thickness, grounding, controller signal processing, and electromagnetic-noise conditions.. Scope note: The magnitude of these effects depends on the particular sensor, controller, enclosure, and electrical environment. ↩
-
"(PDF) 43.4: High Brightness Direct LED Backlight for LCD‐TV", https://www.academia.edu/125479815/43_4_High_Brightness_Direct_LED_Backlight_for_LCD_TV. Display-energy research reports that LCD luminance is strongly linked to backlight power, so higher brightness settings can raise electrical consumption and the associated thermal load. Evidence role: mechanism; source type: research. Supports: Higher LCD luminance commonly requires greater backlight drive, which increases electrical power use and creates additional heat that must be dissipated.. Scope note: The relationship is technology- and design-dependent; efficiency improvements and automatic brightness controls can change the magnitude of the increase. ↩
-
"Multi-Layer Anti-Reflection Coatings", http://hyperphysics.phy-astr.gsu.edu/hbase/phyopt/antiref.html. Optics literature explains that reflections arise at material interfaces in display assemblies; reducing air gaps or applying optical coatings can reduce reflected light and improve apparent contrast under ambient illumination. Evidence role: mechanism; source type: paper. Supports: Optical interfaces in a display stack create reflections, while index matching, optical bonding, and anti-reflective treatments can alter reflected light and perceived contrast.. Scope note: The resulting readability depends additionally on ambient lighting, viewing angle, display luminance, and the specific materials used. ↩
-
"(PDF) 43.4: High Brightness Direct LED Backlight for LCD‐TV", https://www.academia.edu/125479815/43_4_High_Brightness_Direct_LED_Backlight_for_LCD_TV. Studies of high-luminance LCD backlights identify heat generation and thermal management as design constraints because additional optical output is commonly accompanied by greater electrical input power. Evidence role: mechanism; source type: paper. Supports: High-luminance LCD designs can require higher backlight power and therefore increased heat dissipation capacity.. Scope note: Heat output cannot be inferred from brightness alone, since panel size, backlight efficiency, duty cycle, and ambient conditions also matter. ↩