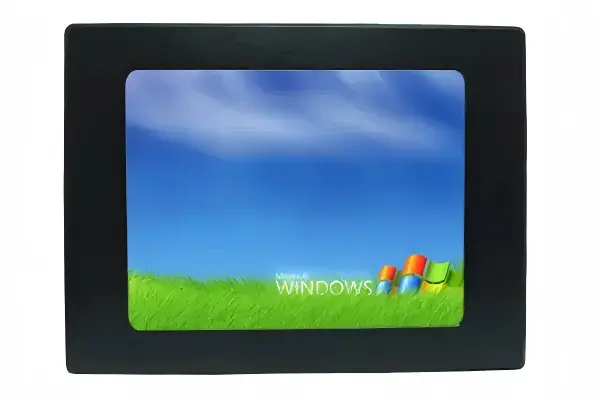
ATM monitor replacement is often urgent when a cash machine or self-service terminal develops a dim, damaged, or failed display. The risk is that a screen with the same size and resolution may still have incompatible power, signal, connector, or mounting details. I recommend a structured verification process before anyone orders a replacement.
An NCR or Wincor ATM monitor replacement should be selected by the exact ATM model, display position, original monitor part number, signal interface, power input, connector type, and mechanical dimensions—not by brand name, screen size, or resolution alone. The lowest-risk approach is to review these details with a supplier, validate one sample in the target machine, and let a qualified technician confirm final machine-level operation.
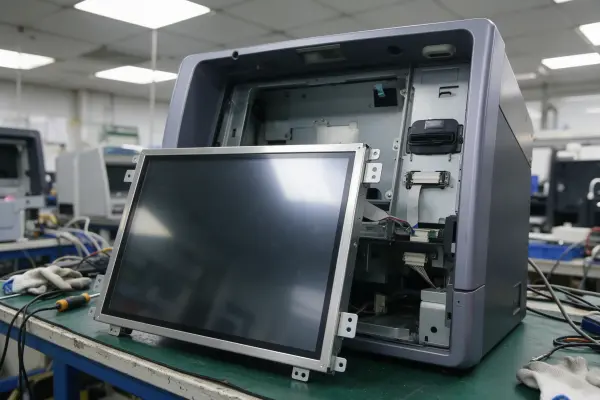
In my work reviewing industrial display specifications for ATM and self-service equipment, I have seen how small differences create large installation problems. A replacement can produce a clear image on a bench but fail to fit the housing, reach the cable, or communicate correctly in the machine. The sections below explain what buyers should verify before placing an order.
Why Is ATM Monitor Replacement Not a Simple “Compatible” Purchase?
An ATM display may fail without warning, and maintenance teams often need a fast replacement to restore service. That urgency can push buyers toward broad terms such as “NCR compatible monitor” or “Wincor replacement LCD.” However, generic compatibility claims can lead to wrong-part orders, repeat labor, and longer downtime.
ATM monitor replacement is a machine-specific engineering and procurement decision. A screen is only a suitable candidate when its electrical interface, power requirements, controller relationship, mechanical design, and operating conditions align with the installed ATM or kiosk configuration. “Compatible” should always be tied to a verified machine model and display position.
Brand Compatibility Is Not Model Compatibility
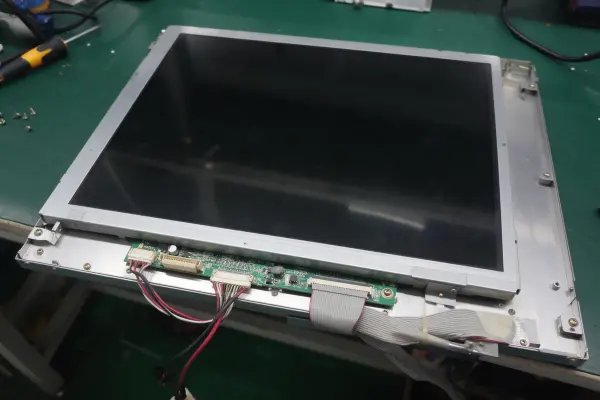
NCR and Wincor are equipment brands with multiple terminal generations, cabinet designs, display assemblies, and service configurations.[1] One brand can use different display sizes, panel suppliers, controller boards, cable pinouts, mounting patterns, and voltage inputs across its product range.
For this reason, I do not treat a request such as “I need an NCR monitor” as enough information for a confident quotation. I first need to understand which machine is involved and where the display is installed.
An ATM may include more than one display, such as:
- A customer-facing main display
- An operator or service display
- A receipt-printer or maintenance interface display
- A touch-enabled screen
- A small auxiliary LCD within a self-service terminal
Each location can have different optical, mechanical, and electrical requirements.
A display can be “NCR compatible” for one identified NCR configuration while being unsuitable for another NCR unit. The same principle applies to Wincor equipment.
What a Same-Size Screen Does Not Tell You
A 15-inch LCD with XGA resolution may appear similar to another 15-inch XGA LCD. Yet several hidden differences can prevent a successful replacement:
| Verification Area | Why It Matters | Risk if It Is Ignored |
|---|---|---|
| Signal interface | LVDS, eDP, VGA, DVI, HDMI, and proprietary arrangements differ[2] | No image, unstable image, or damaged interface |
| Backlight power | LED and CCFL backlight systems use different power designs | Backlight failure or incompatible inverter connection |
| Input voltage | Common values include 5V, 12V, and other system-specific inputs | Monitor will not power on or may be damaged |
| Connector type | Pin count, pitch, orientation, and locking method vary | Existing cable cannot connect |
| Controller board | The machine may rely on a specific controller-board relationship | Signal or timing mismatch |
| Touch interface | USB, RS-232, I²C, or custom touch connections may differ | Touch function does not work |
| Mechanical structure | Brackets, bezel dimensions, and mounting holes vary | Screen does not fit the terminal |
I have found that photos often reveal details that a short written inquiry misses. A clear image of the old label, front view, rear view, connectors, and mounting points can prevent assumptions early in the selection process.
What Information Should You Collect Before Ordering an ATM Monitor Replacement?
When an ATM display is down, buyers may only know the visible size or the equipment brand. That information is useful, but it is not enough to identify a reliable substitute. Missing label details or connector photographs can turn a straightforward replacement into a costly guessing exercise.
Before ordering an ATM monitor replacement, collect the original display’s complete part-number label, ATM model, screen position, connector and cable photos, power information, mounting measurements, and touch requirements. This evidence gives the supplier a practical basis for assessing display-level and mechanical matching before a sample is sent.
The Essential Pre-Purchase Information Package
I recommend that maintenance providers create a standard information package for every failed or obsolete display. This helps technical teams, purchasing teams, and suppliers work from the same facts.
The most useful package includes the following.
ATM manufacturer and exact machine model
Record the full equipment model, not only “NCR ATM” or “Wincor ATM.” If available, include the machine serial number for the equipment owner’s internal reference.Display position in the terminal
State whether the unit is customer-facing, service-facing, touch-enabled, or part of another subsystem. The physical location affects viewing angle, bezel requirements, cable length, and mounting design.Original monitor part-number label
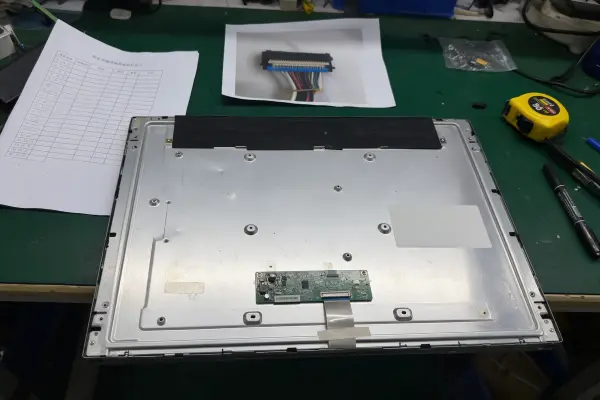
Take a high-resolution photograph of every label on the display assembly, controller board, and attached inverter or power board. Include all characters, suffixes, revisions, and barcodes where readable.Front, rear, and side photographs
A front image shows visible-area and bezel needs. Rear images show brackets, board placement, and cable exits. Side images help confirm thickness and clearance.Connector close-up photographs
Photograph every connector with the cable disconnected where safe and permitted. Capture the pin side, connector keying, cable orientation, and any printed connector markings.Mechanical measurements
Measure outer width, height, thickness, active area, mounting-hole spacing, hole type, and available rear clearance. Even a few millimeters can matter in a compact ATM cabinet.[3]Electrical and interface information
Record input voltage, interface type, backlight connection, touch connection, and any visible board markings. If the machine service documentation lists these items, provide that documentation for review.Operating environment
Note whether the terminal is indoor, outdoor, semi-outdoor, heated, ventilated, or exposed to direct sunlight. Brightness, temperature range, and enclosure sealing may affect the appropriate display specification.
A Practical Measurement Table
I encourage buyers to document dimensions in millimeters and photograph the measurement process when possible. This gives both sides a reference if questions arise later.
| Item to Measure | Record This Detail | Typical Reason for Review |
|---|---|---|
| Outer dimensions | Width × height | Confirms installation opening and bracket envelope |
| Overall thickness | Panel plus boards and rear housing | Confirms rear clearance |
| Active area | Visible image area | Avoids bezel mismatch |
| Mounting holes | Horizontal and vertical spacing | Confirms bracket alignment |
| Hole specification | Diameter, thread, depth | Confirms screw compatibility |
| Cable route | Exit direction and available bend space | Avoids pinched or short cables |
| Bezel overlap | Front-edge clearance | Prevents gaps or blocked image area |
In one specification review, I have seen a display assembly appear correct from its front dimensions but require more rear clearance because its controller board sat in a different location. I would treat that type of finding as a reason to pause and validate a sample, not as a reason to force an installation.
Which Electrical Details Matter Most for NCR and Wincor Compatible Options?
A replacement display can look mechanically correct and still fail when connected to the ATM. This is especially frustrating because the issue may not be visible until a field technician opens the cabinet, disconnects the old unit, and attempts installation. Electrical verification should happen before that stage whenever possible.
For NCR and Wincor compatible options, buyers should verify the display signal type, connector pinout, input voltage, backlight design, controller-board arrangement, and touch interface. A supplier can compare available display specifications, but the equipment owner or qualified technician should confirm machine-level behavior, software operation, and any OEM requirements.
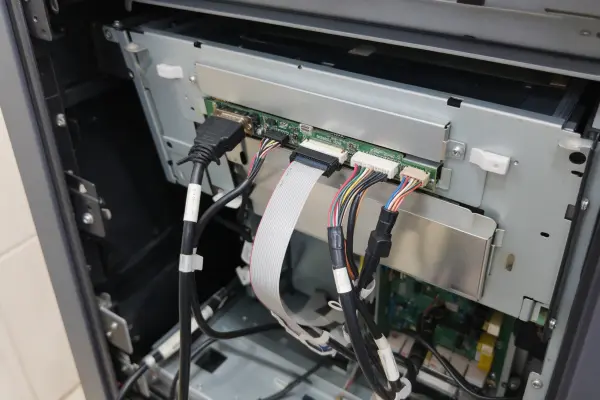
Signal Interface and Timing
Industrial and legacy ATM systems may use several display signal arrangements. The monitor assembly may receive a conventional external video signal, an internal panel signal, or a system-specific connection through a controller board.
The buyer should verify:
- Whether the host provides VGA, DVI, HDMI, DisplayPort, LVDS, eDP, or another interface
- The connector style and pin arrangement
- The required resolution and refresh timing
- Whether the existing monitor includes an integrated controller board
- Whether the controller board is separate from the LCD panel
- Whether cable length or shielding requirements affect signal integrity
A bare LCD panel and a complete monitor assembly are not the same procurement category.[4] A bare panel may require the original controller board, a matched controller board, or additional engineering work. A complete replacement monitor may simplify installation, but it must still match the cabinet and host system.
Power and Backlight Requirements
Power matching is equally important. Buyers should not assume that displays with similar appearance use the same input requirements.
Key questions include:
- Does the existing assembly accept 12V DC, 24V DC, or another voltage?
- Does the machine supply power through the video cable or through a separate harness?
- Does the display use an LED backlight or an older CCFL backlight?
- If CCFL is present, does the assembly use a separate inverter?
- Is the replacement expected to reuse an original power board, inverter, or cable harness?
- Does the ATM have a voltage tolerance requirement that needs review?
Older systems can be especially sensitive to this issue. A modern LED-backlit solution may offer practical benefits in some applications, but it is not automatically a drop-in replacement for a CCFL-based assembly. The change may affect power, mechanical fit, dimming control, and controller compatibility.
Touchscreen and Peripheral Considerations
For touch-enabled ATM displays, the screen image is only one part of the system. The touch layer may use projected capacitive, resistive, infrared, or other technology.[5] The interface can be USB, RS-232, or another arrangement.
I recommend that buyers confirm:
- Touch technology
- Touch controller location
- Touch cable connector
- Operating system and driver requirements
- Calibration process
- Glass thickness and bezel clearance
- Required environmental sealing
A supplier can identify a touch display candidate based on provided specifications. However, I would not present that review as proof that the ATM software, firmware, encryption environment, or transaction workflow will operate correctly. Those final checks belong with the equipment owner and a qualified field technician.
How Should You Verify Mechanical Fit for an ATM Monitor Replacement?
A display that powers on and shows the correct image may still be unusable if it does not fit inside the terminal. ATM cabinets are compact, and their display assemblies often use custom brackets, narrow bezels, precise openings, and controlled cable paths. Mechanical verification deserves the same attention as electrical matching.
Mechanical ATM monitor replacement verification should cover outer dimensions, active area, bezel overlap, mounting-hole pattern, bracket design, thickness, controller-board location, cable exit direction, and installation clearance. Buyers should validate these factors with drawings, photographs, and a physical sample before approving broader replacement quantities.
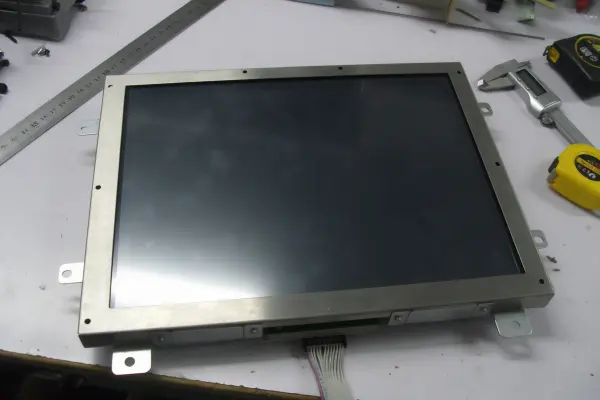
Check the Entire Display Assembly
Many buyers focus on the LCD panel dimensions. I understand why: panel size is easy to see and often appears on the label. Yet the installed assembly may include a touch panel, controller board, shielding, rear cover, mounting tabs, inverter, or custom metalwork.
The complete assembly must fit the available space.
A thorough mechanical review should compare:
- External width and height
- Total assembly thickness
- Visible-area position
- Front bezel shape and overlap
- Mounting-hole coordinates
- Bracket geometry
- Screw size and insertion depth
- Rear component height
- Cable exit location
- Minimum cable bend radius
- Ventilation and heat dissipation space
Why Drawings Matter
Photographs are helpful, but a dimensional drawing is better for final comparison. I recommend that buyers request a supplier drawing for the proposed replacement and compare it against measurements from the removed assembly.
| Mechanical Review Point | What to Compare | Buyer Action |
|---|---|---|
| Width and height | Overall envelope | Confirm fit within cabinet opening |
| Thickness | Deepest rear component | Confirm no interference with internal parts |
| VESA or custom holes | Spacing and thread type | Confirm brackets can be reused or adapted |
| Active area | Image position behind bezel | Confirm no cropping or exposed gaps |
| Cable exit | Direction and location | Confirm cable reaches without strain |
| Controller board | Position and depth | Check clearance against cabinet frame |
| Front surface | Touch glass and bezel edge | Confirm appearance and user access |
Avoid Uncontrolled Bracket Modifications
A field team may be tempted to drill holes, bend brackets, or alter the bezel to make an almost-compatible screen fit. That approach can create new risks, including vibration issues, cable stress, poor grounding, reduced ingress protection, or serviceability problems.
I advise buyers to treat mechanical modification as an engineering change that requires approval from the equipment owner. It may also affect OEM support status, local compliance responsibilities, or future maintenance procedures.
At AplusLCD, we can review drawings, photographs, and mounting data for a proposed industrial display configuration. If a custom bracket, bezel, brightness level, touch solution, or power input is needed, we can assess feasibility during the specification stage — starting from our panel mount LCD monitor range. Still, the final installed-machine acceptance should be completed by the responsible equipment owner or qualified service professional.
What Is the Lowest-Risk ATM Monitor Replacement Workflow?
The biggest challenge in replacement sourcing is not finding a display that appears similar. The real challenge is reducing uncertainty before a maintenance provider commits to multiple units. A disciplined workflow helps buyers avoid repeating the same installation mistake across a fleet.
The lowest-risk ATM monitor replacement workflow is: identify the old assembly, document the machine and interface, compare electrical and mechanical specifications, order one sample, test it in the target terminal, record results, and only then approve a pilot or volume order. This sequence reduces wrong-part risk without claiming universal compatibility.
Step 1: Identify the Failed Display Assembly
Start with the old monitor, not the replacement catalog. Record the complete part number, panel label, board label, cable markings, and machine information. If the original display is still functional enough to test, document brightness behavior, touch response, viewing angle, and any intermittent symptoms.
A failed screen may not be the only source of the problem. The root cause could involve a cable, power supply, controller board, host system, backlight circuit, or software configuration. A qualified technician should diagnose the equipment before the buyer assumes that the monitor is the failed component.
Step 2: Build a Comparison Sheet
I recommend that buyers compare the original and proposed unit line by line. This makes gaps visible before ordering.
| Requirement | Original Assembly | Proposed Replacement | Status |
|---|---|---|---|
| ATM model and position | Buyer-provided | Supplier review basis | Verify |
| LCD size and resolution | Record from label | Record from datasheet | Compare |
| Signal interface | Record connector and signal | Confirm supported input | Verify |
| Power input | Record voltage and connector | Confirm voltage range | Verify |
| Touch method | Record technology and interface | Confirm matching option | Verify |
| Outer dimensions | Measure in mm | Check drawing | Compare |
| Mounting holes | Measure pattern | Check drawing | Compare |
| Brightness | Record if available | Confirm specification | Review |
| Temperature range | Define installation environment | Confirm specification | Review |
| Certificates | Define market requirement | Request documents | Verify documents |
Step 3: Validate One Sample in the Actual Terminal
A sample is the practical center of a responsible replacement program. Bench testing is useful, but the real validation should occur in the target machine under normal installation conditions.
The sample process should check:
- Physical insertion into the cabinet
- Mounting-hole alignment and secure fastening
- Cable reach and connector engagement
- Correct image output during startup and normal operation
- Touch response, if applicable
- Brightness and readability in the installed environment
- No interference with doors, locks, service panels, or internal components
- Stable operation during an agreed observation period
- Technician feedback on installation effort and service access
I have participated in display sample reviews where a proposed unit matched the headline specifications but raised a cable-routing question during physical validation. That is exactly why I prefer a sample-first process. A sample does not guarantee every fleet variation will be identical, but it provides much stronger evidence than a datasheet alone.[6]
Step 4: Approve a Pilot Before Volume Replacement
After the sample passes, a maintenance provider may choose a small pilot quantity for additional verification across similar machines. This is useful when a fleet has different production revisions, cabinet options, or historical service changes.
For volume procurement, buyers should also confirm:
- Revision-control process
- Labeling requirements
- Packaging protection
- Batch traceability
- Supply continuity expectations
- Inspection requirements
- Shipping terms and lead time
- DOA and RMA process
- Required compliance documents
At AplusLCD, our industrial display manufacturing process includes documented inspection stages and 24-hour aging tests for applicable finished units. Buyers should still request and verify the documents relevant to their target market and application. Certification documents, supplier quality procedures, and sample results should support procurement decisions, but they do not replace equipment-owner approval or field validation.
Frequently Asked Questions
Can I replace an NCR ATM monitor with any monitor of the same size?
No. The same size does not confirm signal, voltage, connector, touch, mounting, or bezel compatibility. I recommend using the exact ATM model, original display part number, connector photos, and installation measurements to identify a candidate, then validating one sample in the target terminal.
Are Wincor compatible monitors universally compatible with all Wincor machines?
No. “Wincor compatible” should refer only to a specific reviewed machine configuration or display assembly. Wincor terminals can differ by model, display location, interface, mechanical design, and revision. Buyers should request machine-specific comparison and perform sample validation before ordering multiple units.
What photos should I send for an ATM monitor replacement inquiry?
Send clear photos of the front, rear, side profile, all labels, mounting holes, controller board, power connector, video connector, touch connector, and cable routing. I also recommend including a photo of the display installed inside the ATM cabinet and a ruler-based measurement photo.
Should I buy a bare LCD panel or a complete ATM monitor assembly?
The correct choice depends on the existing design. A bare LCD panel may work when the original controller board, touch assembly, and mounting system can be retained and verified. A complete assembly may simplify replacement, but it requires careful electrical and mechanical comparison. A qualified technician should assess the machine-level configuration.
Can a supplier guarantee that a replacement will work in my ATM?
A supplier can assess provided specifications, drawings, labels, and photographs for display-level matching. However, final operation depends on the actual ATM, cables, host electronics, software, firmware, installation condition, and any OEM requirements. The equipment owner or qualified field technician should confirm final acceptance.
Related Reading
- Industrial LCD Monitor Solutions
- Industrial Panel Mount LCD Monitors
- ATM & Banking Display Solutions
Conclusion
A successful ATM monitor replacement is not based on a brand name, screen size, or resolution alone. I recommend that maintenance providers verify the exact machine model, display position, original part number, signal interface, power, connectors, mechanical dimensions, and touch requirements. The most reliable path is to compare specifications, validate a physical sample, and then proceed with a pilot or volume order. If you are sourcing a replacement display for an NCR, Wincor, or other self-service terminal, send us your labels, photos, drawings, and requirements so we can help you assess a suitable industrial display option.
Footnotes
-
"Diebold Nixdorf", https://en.wikipedia.org/wiki/Diebold_Nixdorf. Published product histories and self-service-terminal documentation show that NCR and Wincor Nixdorf marketed multiple ATM generations and terminal families, rather than a single standardized terminal configuration. Evidence role: historical_context; source type: institution. Supports: Industry and corporate-history sources document that NCR and Wincor Nixdorf developed multiple generations and families of self-service banking terminals.. Scope note: Portfolio history does not by itself show the display configuration of any individual terminal or service revision. ↩
-
"Low-voltage differential signaling", https://en.wikipedia.org/wiki/Low-voltage_differential_signaling. LVDS, Embedded DisplayPort, VGA, DVI, and HDMI are separate display-interface technologies with differing electrical signaling, protocols, and connector implementations. Evidence role: definition; source type: encyclopedia. Supports: LVDS, Embedded DisplayPort, VGA, DVI, and HDMI use distinct signaling standards and connector ecosystems.. Scope note: Interface type alone is insufficient to establish compatibility because implementations can also differ in pinout, timing, firmware, and power arrangement. ↩
-
"NASA-STD-5017B Approved", https://standards.nasa.gov/sites/default/files/standards/NASA/B/2022-12-06-NASA-STD-5017B-Approved.pdf. Mechanical-design guidance on tolerances and stack-up explains that small dimensional deviations can produce assembly interference or inadequate clearance when components are integrated into constrained enclosures. Evidence role: mechanism; source type: government. Supports: Mechanical assemblies require allowance for dimensional tolerances, clearances, and tolerance stack-up to avoid interference during installation and operation.. Scope note: General tolerance principles do not specify the clearance required by a given ATM cabinet. ↩
-
"Liquid-crystal display", https://en.wikipedia.org/wiki/Liquid-crystal_display. Display-engineering references distinguish an LCD panel from a finished monitor or display assembly, the latter potentially incorporating controller electronics, power components, touch hardware, mechanical mounting, and enclosure elements. Evidence role: definition; source type: education. Supports: An LCD panel is a display component, while a finished display module or monitor can incorporate driving electronics, power circuitry, enclosure parts, and input interfaces.. Scope note: The exact contents of an assembly vary by manufacturer and product design. ↩
-
"Review of Capacitive Touchscreen Technologies - PMC - NIH", https://pmc.ncbi.nlm.nih.gov/articles/PMC8309784/. Touchscreen references classify projected-capacitive, resistive, and infrared systems as distinct sensing technologies, each using a different method to detect user input. Evidence role: definition; source type: education. Supports: Projected-capacitive, resistive, and infrared touchscreens use different sensing mechanisms and construction methods.. Scope note: A technology classification does not identify the controller, connector, driver, or calibration requirements of a particular ATM touchscreen. ↩
-
"NIST Special Publication 500-234", https://nvlpubs.nist.gov/nistpubs/Legacy/SP/nistspecialpublication500-234.pdf. Verification-and-validation guidance recognizes test results obtained in a representative operating environment as more direct evidence of system behavior than specification review alone, while requiring attention to configuration variation and test scope. Evidence role: expert_consensus; source type: government. Supports: Systems-engineering verification and validation practice treats testing in a representative operational environment as stronger evidence than document review alone.. Scope note: Testing one sample does not demonstrate performance or fit for untested terminal revisions or fleet modifications. ↩