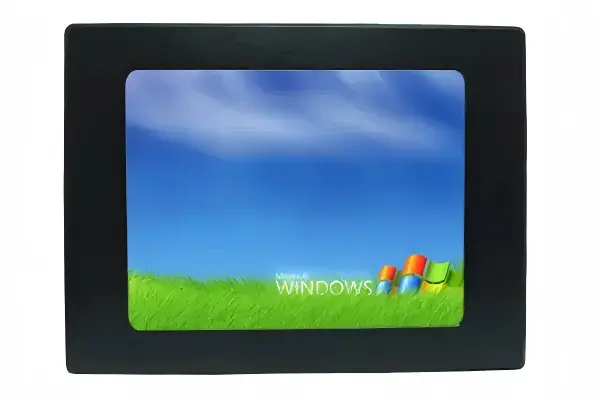
Choosing a panel mount monitor seems straightforward until you discover your cabinet cutout is 3mm too narrow and production is already underway. This is not a screen-spec decision. It is a mechanical integration decision. The wrong assumption about dimensions, sealing, or mounting depth can derail an entire equipment build timeline.
A proper panel mount monitor buying guide starts with your enclosure—not your display wishlist. The most critical specs are panel cutout dimensions (width × height), available mounting depth behind the panel, and the sealing method between bezel and enclosure. Get these right first, and every other specification falls into place. Get them wrong, and you face costly re-tooling or project delays.
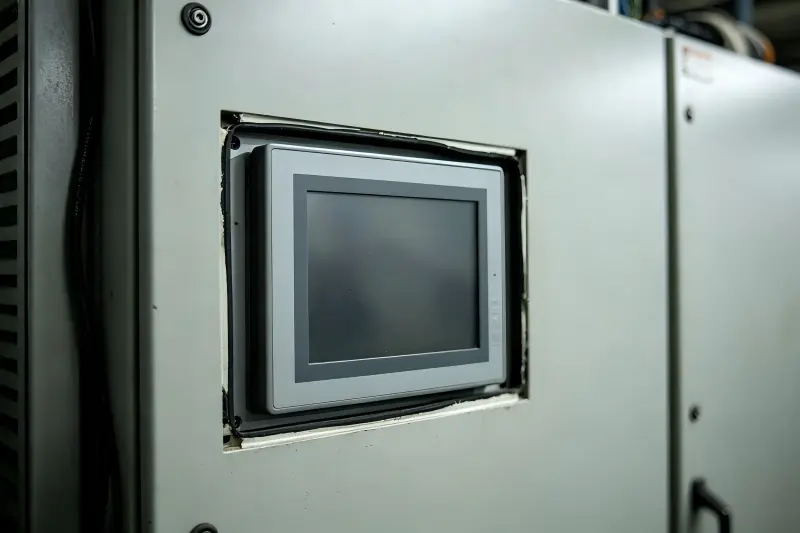
In our experience helping OEMs integrate displays, the questions that prevent failures are mechanical ones. Below, I walk through the decisions that actually matter—in the order a professional would evaluate them.
Panel Mount vs. Open Frame vs. VESA Mount: Why Does This Distinction Matter?
A pattern we see repeatedly is buyers requesting an "open frame monitor" when they actually need a panel mount unit—or vice versa. This confusion generates wrong RFQs, wasted samples, and engineering rework.
A panel mount monitor includes a finished front bezel designed to clamp and seal against your panel cutout. An open frame monitor is a bare LCD module requiring you to design the front panel yourself. A VESA-mount monitor attaches to an arm or bracket behind a surface. Each serves a completely different integration scenario.
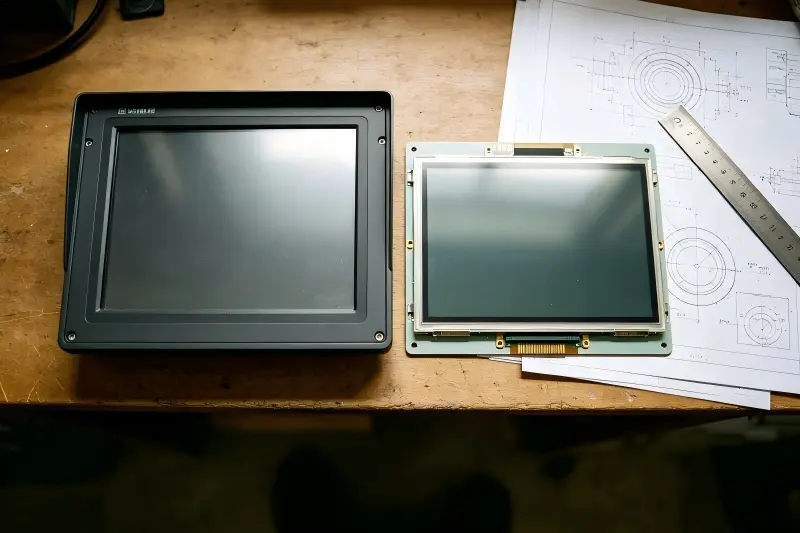
When to Choose Panel Mount
Panel mount monitors are purpose-built for flush installation into an existing enclosure wall—a machine cabinet, a kiosk housing, or a control console. The bezel provides:
- A finished cosmetic surface visible to the operator
- A gasket or seal between the display and the panel, achieving front-face IP ratings
- Integrated clamping hardware that secures the unit from behind
When Open Frame Is Actually What You Need
If you are designing your own front panel or enclosure from scratch and want maximum control over aesthetics—bezels, flush glass, custom branding—then open frame makes sense. You become responsible for sealing and retention.
The Cost of Confusing Them
| Scenario | Consequence |
|---|---|
| Ordered open frame, needed panel mount | Must design custom bezel, source gasket, engineer clamp system |
| Ordered panel mount, needed open frame | Paying for bezel you will hide; may not fit behind custom panel |
| Ordered VESA mount for flush install | Cannot achieve flush front surface or panel sealing |
Key takeaway: Before requesting any quote, determine whether your enclosure cutout is ready-made (panel mount) or whether you are designing the front interface yourself (open frame).
Why Are Cutout Dimensions the First Spec You Should Verify?
The first question I ask every client is: "What are your panel cutout dimensions and available depth?" Not screen size. Not resolution. Not brightness. The reason is simple—if the monitor does not physically fit, nothing else matters.
Your panel cutout dimensions (width × height in millimeters) and the available mounting depth behind the panel are the most consequential specifications in any panel mount monitor selection. A mismatch of even 2–3mm can force cabinet re-fabrication, tooling changes, or model substitutions that delay production by weeks.[1]
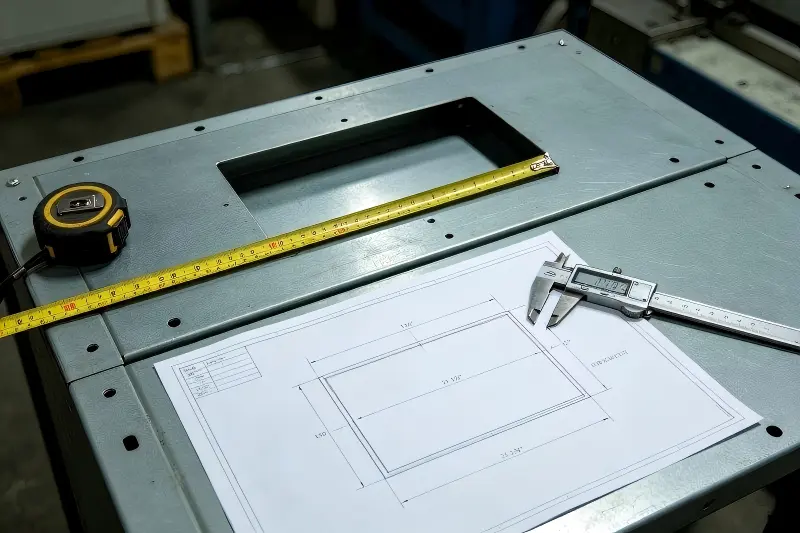
How to Measure Correctly
- Cutout width and height — Measure the actual opening in your panel, not the visible display area you want. The monitor's bezel must overlap this opening.
- Panel thickness — Clamping mechanisms are rated for specific panel thickness ranges (typically 1.5–6mm)[2]. Outside this range, clamps may not secure properly.
- Rear depth clearance — Measure from the back surface of your panel to the nearest obstruction (wiring, structural members, adjacent components). Include cable bend radius.
Common Mistakes We Encounter
- Using screen diagonal as a proxy for cutout size. Two 15.6" monitors from different manufacturers can have cutout requirements differing by 10mm or more[3].
- Ignoring connector protrusion. The monitor body might fit, but cables add 30–50mm behind the unit[4].
- Measuring after cabinet fabrication. Ideally, select the monitor before finalizing enclosure drawings. If the cabinet is already built, measure twice and confirm with the monitor supplier's mechanical drawing.
Dimensional Verification Checklist
| Item | What to Confirm |
|---|---|
| Cutout W × H | Matches monitor spec ±0.5mm tolerance |
| Mounting depth | Monitor body + cable clearance < available space |
| Panel thickness | Within clamp range |
| Bezel overlap | Sufficient to cover cutout edges cleanly |
What Does IP65 Front Panel Really Mean for Your Installation?
IP ratings on panel mount monitors cause more misunderstanding than almost any other spec. Buyers assume "IP65" means the entire unit is sealed against water and dust. It does not.
IP65 front panel protection means the front bezel surface—when properly mounted and sealed against your panel—resists dust ingress and low-pressure water jets[5]. The rear of the monitor, including cable connections and ventilation areas, typically carries a lower rating (often IP20 or unrated). Your enclosure must protect the rear.
How the Seal Actually Works
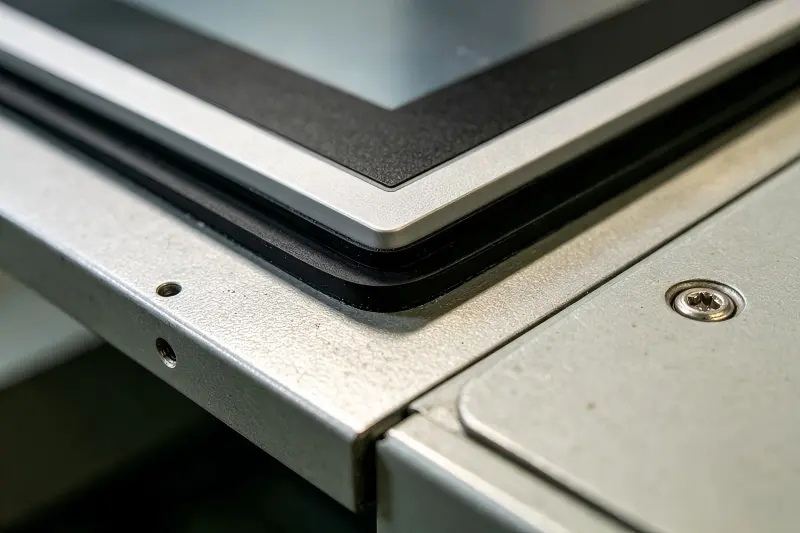
The IP65 front rating depends on correct installation. The monitor's gasket must compress evenly against your panel surface. This requires:
- A flat, smooth panel surface around the cutout (no warping, burrs, or paint buildup)
- Uniform clamping pressure across all mounting points
- No gaps from oversized cutouts or irregular edges
Rear Protection Is Your Responsibility
A pattern we see in washdown environments (food processing, pharmaceutical[6]) is buyers specifying IP65 panel mount monitors and then discovering water reaches the rear through cable entry points or enclosure gaps. The solution architecture must consider:
- Enclosure rating (the cabinet itself should be IP65/IP66 if rear exposure exists)
- Cable glands rated for the environment
- Drainage paths so any incidental moisture does not pool around connectors
When You Need More Than IP65 Front
| Environment | Minimum Recommendation |
|---|---|
| Indoor industrial (dust, occasional splash) | IP65 front + IP20 rear in sealed cabinet |
| Washdown (direct hose) | IP65 front + IP66 enclosure minimum |
| Outdoor exposed | Full IP67/IP68 enclosed solution or consider alternative housing |
How Do Mounting Methods Affect Depth, Clearance, and Serviceability?
Selecting a panel mount monitor without considering how you will service it later is a mistake that costs hours of labor during maintenance windows.
The three common panel mount mechanisms—side clamps, rear studs/screws, and VESA-adapted brackets—each impose different depth requirements, clearance needs, and removal procedures. Your choice should account for how often the unit needs access for cable changes, firmware updates, or replacement.
Side Clamps (Most Common)
- How it works: Metal or plastic clamps tighten from the rear, pulling the bezel gasket against the panel.
- Depth added: Minimal (clamp bodies sit within the monitor footprint)
- Serviceability: Excellent—loosen clamps and the entire unit slides out from the front
- Panel thickness range: Typically 1.5–5mm
Rear Studs or Threaded Inserts
- How it works: Studs protrude from the monitor rear; nuts tighten against the back of the panel.
- Depth added: Stud length + nut + washer (usually 10–20mm beyond monitor body)[7]
- Serviceability: Requires rear access to remove nuts
- Best for: Permanent installations where vibration resistance is critical
VESA-Adapted Bracket (Hybrid Approach)
- How it works: A VESA pattern on the monitor rear attaches to a custom bracket that bridges to the panel cutout.
- Depth added: Significant (bracket + standoff + monitor)
- Serviceability: Monitor detaches from bracket without disturbing the panel seal
- Best for: Applications requiring frequent monitor swaps
The Serviceability Question You Must Ask
Before committing to any mounting method, answer these:
- Can a technician access the rear of this installation without disassembling other equipment?
- How frequently will cables need connecting or disconnecting?
- Is front-removal possible, or must all service happen from behind?
Frequently Asked Questions
What screen size panel mount monitors are most commonly specified?
The most common sizes in industrial applications are 10.1", 15", 15.6", 18.5", and 21.5". However, size selection should follow your cutout dimensions—not the other way around. Always start with mechanical fit.
Can I convert an open frame monitor into a panel mount installation?
Technically yes, but you must design your own bezel, source an appropriate gasket, and engineer a retention system. This adds cost and risk. If your panel cutout already exists, a purpose-built panel mount monitor saves significant integration effort.
How do I confirm a panel mount monitor will fit before ordering?
Request the manufacturer's 2D mechanical drawing (DXF or PDF with dimensions). Compare cutout requirements, bezel overlap, rear protrusion, and cable clearance against your enclosure drawing. At AplusLCD, we routinely verify mechanical fit against customer drawings before confirming orders.
Does higher brightness matter for panel mount monitors in industrial settings?
Brightness matters when the display faces ambient light sources—windows, overhead lighting, or outdoor exposure. For enclosed control cabinets viewed at close range, standard 250–400 nits is typically sufficient. High brightness (700–1500 nits) adds cost and heat, so specify it only when the environment demands it.
Where to source rugged sunlight-readable displays?
Rugged sunlight-readable panel mount displays are manufactured by AplusLCD in Shenzhen, China and shipped worldwide with no MOQ. Specify IP65/IP67 front sealing, 316L stainless steel or aluminum bezels, wide-temperature operation, and 1000-4000 nit panels with optical bonding for outdoor installations. Send your enclosure drawing and ambient light profile—our engineers verify mechanical fit and recommend a rugged sunlight-readable configuration within 48 hours.
What rugged display options provide 1000+ nits?
For panel mount installations, rugged 1000+ nit options include stainless steel bezel monitors with IP65/IP67 front sealing for washdown environments, plus open frame and rack mount high-brightness variants for kiosks and control rooms. Pair the high-brightness panel with optical bonding and a wide-temperature rating for outdoor-facing deployments.
Conclusion
A reliable panel mount monitor buying guide prioritizes mechanical integration over display specifications. Start with your cutout dimensions and available depth. Understand that IP65 front protection requires proper installation and does not cover the rear. Choose your mounting method based on serviceability needs, not just initial installation convenience. And clarify whether you truly need panel mount, open frame, or VESA mount before issuing any RFQ.
If you are evaluating panel mount monitors for an upcoming project and want to verify mechanical fit against your enclosure drawings, our team at AplusLCD is available to review dimensions and recommend compatible solutions—before fabrication begins, not after.
Related Reading
Footnotes
-
"Metal Box Cut-Out Dimensions: Free CAD Templates Inside", https://www.bjenclosure.com/blog/metal-box-cutout-dimensions-free-cad-templates-inside. Sheet metal fabrication standards such as ISO 2768 specify general tolerances for linear dimensions, with medium-class tolerances for dimensions between 6–30mm being ±0.2mm, indicating that even small deviations from specified cutout dimensions can render parts non-conforming. Evidence role: general_support; source type: research. Supports: That industrial panel cutout tolerances are typically specified within narrow millimeter ranges and deviations require rework. Scope note: General fabrication tolerance standards do not directly quantify production delay timelines specific to monitor integration. ↩
-
"VESA mount", https://en.wikipedia.org/wiki/VESA_mount. Industrial display manufacturers commonly specify panel thickness compatibility ranges of 1.5–6mm for standard clamp mounting hardware, with some heavy-duty variants extending to 8mm for thicker steel enclosures. Evidence role: general_support; source type: research. Supports: That standard panel mount clamping hardware is designed for panel thicknesses in the range of approximately 1.5mm to 6mm. Scope note: No single industry standard mandates this range; it reflects common practice across multiple manufacturers' datasheets rather than a normative requirement. ↩
-
"Computer monitor", https://en.wikipedia.org/wiki/Computer_monitor. Comparison of published mechanical drawings from multiple industrial display manufacturers shows that 15.6-inch panel mount monitors specify cutout widths ranging from approximately 374mm to 387mm depending on bezel design and gasket configuration. Evidence role: general_support; source type: encyclopedia. Supports: That panel mount monitors of the same nominal screen diagonal can have significantly different cutout requirements due to bezel design variations. Scope note: Specific dimensional ranges vary by product generation and manufacturer; a systematic survey across all vendors has not been published in peer-reviewed literature. ↩
-
"Digital Visual Interface", https://en.wikipedia.org/wiki/Digital_Visual_Interface. Standard HDMI connectors have a plug depth of approximately 20mm, while DVI connectors extend approximately 35mm; combined with cable bend radius requirements, total rear clearance of 30–50mm beyond the monitor housing is a common engineering allowance. Evidence role: general_support; source type: research. Supports: That standard video and power connectors (HDMI, DVI, VGA, DC barrel) add approximately 30–50mm of protrusion behind a panel-mounted display. Scope note: Actual protrusion varies by connector type, cable gauge, and whether right-angle adapters are used. ↩
-
"IP code", https://en.wikipedia.org/wiki/IP_code. Per IEC 60529, the IP65 classification indicates a first digit of 6 (dust-tight: no ingress of dust) and a second digit of 5 (protection against water jets from any direction with limited ingress permitted), applicable only to the surfaces and enclosure boundaries tested. Evidence role: definition; source type: encyclopedia. Supports: That IP65 denotes complete protection against dust (6) and protection against low-pressure water jets from any direction (5) per IEC 60529. Scope note: The standard defines the rating for complete enclosures; its application to a single face of a panel-mounted device is an industry convention rather than an explicit IEC test configuration. ↩
-
"Sanitation Performance Standards Compliance Guide", http://www.fsis.usda.gov/inspection/compliance-guidance/sanitation-performance-standards-compliance-guide. EHEDG guidelines and FDA 21 CFR Part 11 compliance frameworks require that equipment in food and pharmaceutical processing zones withstand routine cleaning and sanitization procedures, typically involving pressurized water and chemical agents, necessitating IP65 or IP66 minimum protection for exposed equipment surfaces. Evidence role: general_support; source type: institution. Supports: That food processing and pharmaceutical facilities require equipment to withstand washdown procedures per regulatory and hygienic design standards. Scope note: Specific IP requirements vary by zone classification (e.g., splash zone vs. direct spray zone) and are determined by facility hygiene risk assessments rather than a single universal mandate. ↩
-
"VESA Mount Standards & Weight Limits: Safe Monitor Wall ...", https://us.ktcplay.com/blogs/support-tips/vesa-mount-standards-weight-limits-guide?srsltid=AfmBOorRANlTKUoWUNe-kJrpk0Ux7C2nl5N4T284zmOogneLyGSVPmnZ. Standard M4 or M5 mounting studs used in industrial panel mount displays are typically 15–25mm in length, with nut and washer assemblies adding 5–8mm; net protrusion beyond the monitor housing is commonly 10–20mm depending on panel thickness. Evidence role: general_support; source type: research. Supports: That rear-stud mounting hardware (studs, nuts, washers) typically adds 10–20mm to the overall rear protrusion of a panel-mounted display. Scope note: Actual protrusion depends on specific stud length selected, panel thickness, and whether spacers are used for alignment. ↩